Studio
This page documents how to use the video streaming and recording studio in the basement at Extraordinary Least Squares. If you want replicate our AV setup, details on what we're using is at the bottom of the page in #Equipment.
Studio Setup

- Turn on the power strip (the red light-up switch on the on the strip behind the desk).
- Adjust the brightness on the primary ring-light. There is a dimmer that is right under the base on the light lightly to the right (while looking from the front) of where it connects to the tripod. Turning all the lights all the way up typically have the best effects (and creates nice catch lights) but can also be quite bright and can be hard to stare at for long periods of time.
- Turn on both the secondary lights on both that are located on tripods on sides of the desk by clicking the switches on the cords going to the light panels. You can optionally add or removed colored gels in the secondary lights. There are gels in the draw in the desk or under the secondary monitor to the left. Emerging consensus in the house seems found that it looks nice with a red gel in one side and no gel in the other.
- [IMPORTANT] Activate the camera by very lightly pressing the shuttle button on the camera (just a half-press down). Once you do this, you should see a stream on the monitor for the mixer the right-side monitor.
- Once you have video, place/adjust your laptop on the laptop stand by adjusting the height of the stand. Things will look most natural if your gaze is as close to directly pointed at the camera as possible. As a result, you will probably want the laptop stand to be as raised as possible without the laptop being visible in the camera frame (again, check the monitor).
- [IMPORTANT] Unmute the RØDE shotgun microphone by pressing "ON" for Mic #1 on the ATEM mixer. Using this microphone will definitely be much better than using your laptop microphone. In general, this microphone is controlled by the buttons in the top right corner of the mixer and the button will light-up red when it is ON.
- Plug the BlackMagic ATEM mixer into your computer by plugging in the USB cable marked "Webcam." Input from the mixer will show up just as a normal webcam so it will work in Linux and should be selectable from within Zoom, Teams, Jitsi, Skype, and so on. The cable that is plugged in is an old-style USB-A cable. If you need USB-C, there is a white cable that should work in the drawer.
- [OPTIONAL] If you want to also share your screen (or a secondary screen) plug HDMI cable labeled "INPUT #2." This will be mapped to the button marked 2 on the video mixer. There is an HDMI→USB-C adapter in the drawer if you need it.
- Ensure that whatever software you are choosing is using the right audio and video input. Both should show up as something like BlackMagic ATEM Mini.
Extra and optional things
The drawers contain a number of goodies including:
- An external USB keyboard.
- An external cordless USB mouse.
- A cordless clicker for giving presentations.
- Gels of various colors of the lights.
Gels are also available for the ring light although they are more work to put on and off.
Using the secondary screen


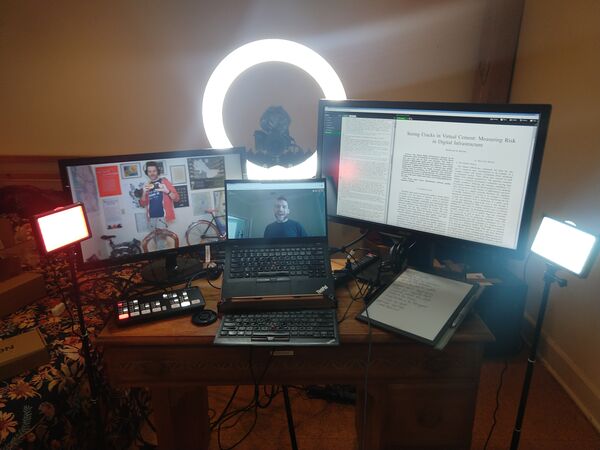
The large monitor on the right side of the screen is setup just to be a second screen and is plugged into a USB-C/Thunderbolt dock which is to the right the of the laptop stand. Mako typically uses it for things like the brady-bunch view from video conferences, webpages, or other material that he does not want to share with others. You can use this by either using plugging in the USB-C cable labeled "Dock" by plugging in any of the items from the dock (like the HDMI cable from the monitor) into your computer.
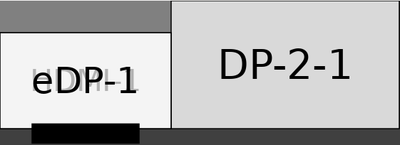
The images included here show two of Mako's different setups.
Tips
- Reduce sound in the room by (a) turning off the washing machine and/or dryer (make sure it turn it on before you leave) and (b) closing the door both to the studio and to the upstairs.
- Make sure that you're on the
leastsquar.esWiFi and not theleastsquar.es-surnoomwhich will have very bad performance. - You can plug extra things into the mixer (e.g., a laptop or another computer) but all input must be HD (1920x1080).
Using the mixer
The best way to get familiar with the Mixer is to play with it! Here are a few tips.
- Video Transitions
- The default mode ("CUT") just switches directly between video. If you click "AUTO" you can then choose different transitions and the length of transitions using using the buttons on the mid/bottom left of the mixer. Once you have selected the transition you want, just hit #1, #2, etc.
- Picture-in-Picture
- If you switch from #1 and to #2 and then press the "ON" button and then one of the area buttons in the the PIP area in the top-middle of mixer, you should see a little version of the video show up over your screen. If you want to move the PIP box to a different corner, just press the corresponding button on the mixer. To turn it off, just press "OFF" or switch back to #1.
- Fate-To-Black
- Just press the "FTB" button.
Basement Studio Schedule
The studio schedule is stored in a Google Calendar that is not publicly shared. Ask User:Willscott for read/write access.
Equipment
For folks interested in replicating our setup, we're using the following the equipment:
- Camera (DSLR): Sony A6000 — Bought on eBay w/o a lens. The A6000 has no ability to take external audio into the camera and this is a pretty big limitation because you have to mix in the computer and things might get out of sync. Getting newer versions (e.g., the A6500 or A6600 or maybe even lower) would "solve" this but the pre-amp isn't great so you might want a mixer anyway. Any decent camera that will take a good lense and do HD-resolution HDMI video out should work.
- Lens: Sigma 16mm F/1.4 — It seems like everybody loves this lens. It works with lots of cameras so you have to get the right one. Sony E- is the right one for the A-series Sony camera but you can get the same lens for other cameras and mounting systems. Great with shallow depth of field. It look great. It's expensive but it's what will make the video look good.
- Shotgun Mic: RØDE VideoMicro — Streamers basically all love this one and it's cheap. You might alternatively want to consider the similar RØDE lav mic. We might buy that one as well.
- Capture card/device: Blackmagic ATEM Mini — You will need something to turn HDMI → Webcam. Streamers seem to love the ATEM Mini. The configuration/management software is not available for Linux but seems to work though through Wine and Windows running in a virtual machine. The way we use the setup, we basically just don't need to use the software. If you were doing a lot of stuff with the chroma-key features (or similar) from Linux, this might be a bigger issue. If you don't need/want the mixer, the Elgato Camlink is a good non-interactive option that just does the conversion but you might need to get an audio embedder in addition to the Camlink so the total cost will be similar ($100+ for each).
- Primary light: Neewer Ring Light — This comes with a tripod that we can also use to mount the camera.
- Secondary lights: Neewer dimmable USB lights — Pair of dinky secondary lights w/ tripods. Both charge from USB. These are super cheap.
- AC adapter for camera: AC-PW20 — This plugs into the camera right in the battery slot. This is important so that you don't run out of battery and so that the camera doesn't overheat when it's running all the time and also trying to recharge the battery.
These are more generic stuff that we needed to have:
- Monitor for the ATEM Mini — We used some random HDMI monitor we have lying around. This one must support full HD.
- Secondary monitor — We used a random monitor we had lying around.
- Cables and adapters: Micro-HDMI → HDMI; stereo mini-male → mini-female extension (10ft); 4x HDMI cables cables; USB-C to HDMI adapters
- Power Strip — Given the backup lights are USB above, it's probably good to use a power strip with at least 2x USB plugs in it.
- Fullsize SD Card (really of any size)
- External keyboard
- External mouse
- Clicker for presentations
Our studio setup cost a little over $1,000 to put together although we got some deals and were able to use material we already had. This be expensive for some people but we have 6 adults living together—including two full-time professors who are teaching from home, so it seemed like a good investment.
